
Export Data to Your EVV Provider
Export your Employee, Client, Service, and visit information from Celayix to your configured Electronic Visit Verification (EVV) provider.
Before exporting, make sure your EVV configuration is complete and the required EVV information has been entered in Schedule Xpress.
Before You Begin
Before exporting data, ensure that:
- EVV functionality has been enabled for your account.
- The required Employee EVV information has been configured.
- The required Client EVV information has been configured.
- The required Service EVV information has been configured.
- Required identifiers and codes match the information expected by your EVV provider.
For instructions on setting up this information, see Configure Data for Export to Your EVV Provider.
Review Your Data Before Exporting
Before completing the export, verify that the visit information is accurate, including:
- Employee
- Client
- Service
- Date of Service
- Clock In and Clock Out times
- Any other information required by your EVV provider
Missing or incorrect information may prevent a visit from being successfully accepted by your EVV provider.
Export EVV Records
Use EVV Export to send visit records to your EVV provider.
- Go to Schedule Xpress > Time Processing.
- Select the appropriate date range and use the available filters to locate the records you want to export.
- Select the applicable shift or shifts.
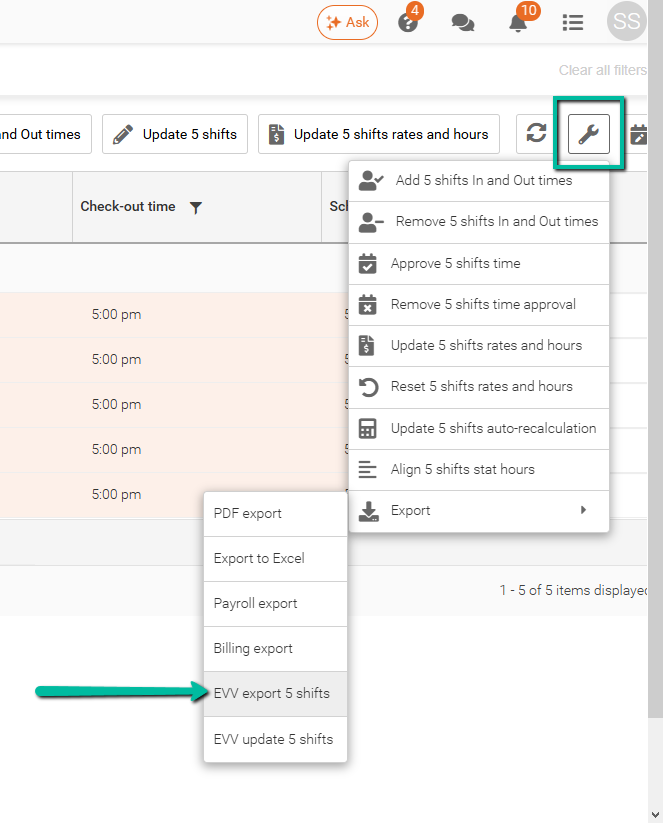
- Click the Time Processing Tools (wrench) menu.
- Select Export > EVV Export.
- Click to send the selected records to your EVV provider.
Tip: The number of selected shifts will be displayed beside EVV Export before you continue.
Update an EVV Record
Use EVV Update when a shift has already been sent to your EVV provider and information needs to be corrected or updated.
Important: EVV Update is intended only for shifts that have previously been exported. For shifts being submitted for the first time, use EVV Export.
Select the Shift to Update
- Go to Schedule Xpress > Time Processing.
- Locate and select the shift that requires an update.
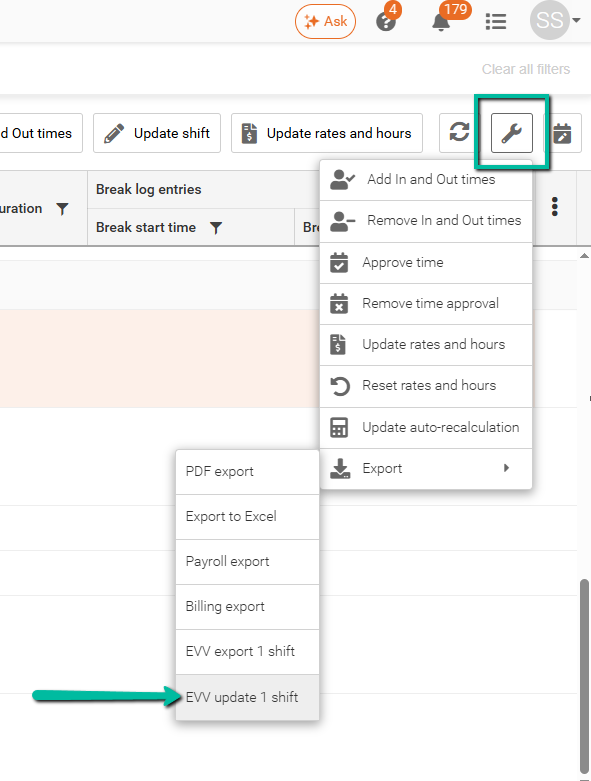
- Click the More Actions (⋮) menu.
- Select Export > EVV Update.
Select a Reason for the Update
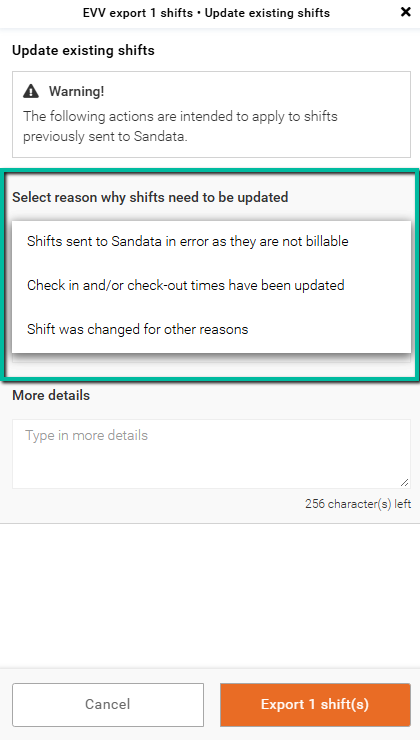
Select the reason that best describes why the previously exported shift needs to be updated.
Available reasons include:
- Shifts sent to the EVV provider in error as they are not billable – Use when a shift was previously exported but should not have been sent because it is not a billable visit.
- Check-In and/or Check-Out times have been updated – Use when the Check-In time, Check-Out time, or both have been changed after the shift was originally exported.
- Shift was changed for other reasons – Use when other information on a previously exported shift has been changed and the update is not specifically related to the Check-In or Check-Out times.
Enter the Reason Code
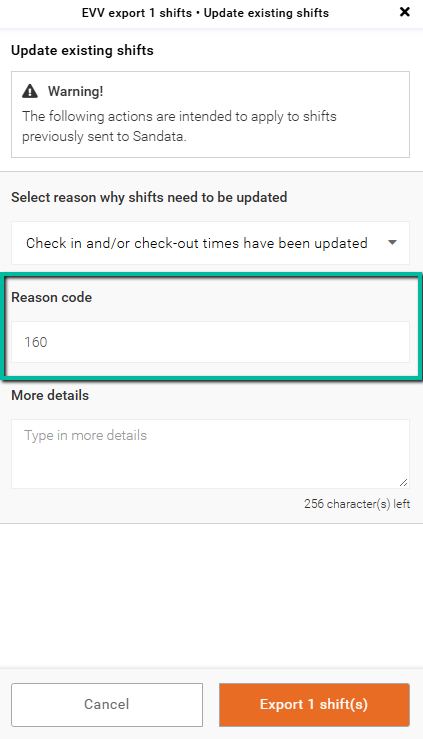
Enter the Reason Code that identifies why the EVV record is being corrected.
Common reason codes include:
| Code | Reason |
|---|---|
150 | Caregiver failed to call in. Verified services were delivered. |
160 | Caregiver failed to call out. Verified services were delivered. |
200 | Mobile app issue. |
Important: The appropriate Reason Code may depend on your EVV provider and the circumstances of the correction. Make sure the code entered accurately reflects why the visit information was changed.
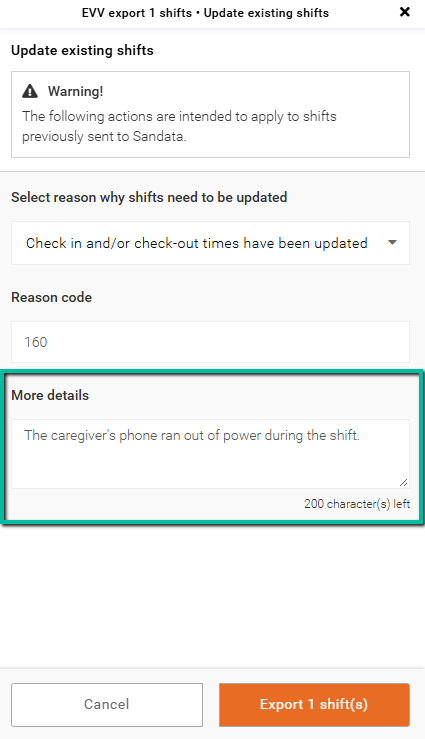
Add More Details
Use More details to provide any additional information about the correction.
This can be used to explain what was changed or provide further context about why the EVV record is being updated.
Submit the Updated Record
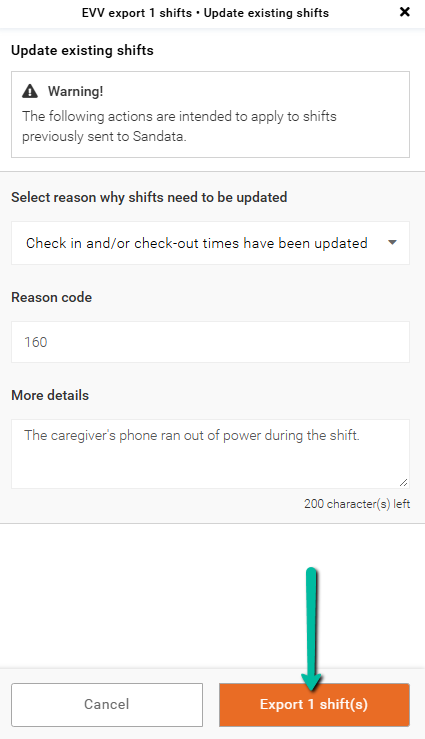
After reviewing the information:
- Confirm the correct reason for the update has been selected.
- Enter the applicable Reason Code.
- Add any necessary information under More details.
- Click Export Shift(s).
The updated shift information will then be sent to your EVV provider.
Tip: If multiple shifts require the same correction, you can select the applicable shifts in Time Processing before choosing EVV Update.
After Exporting
Once the export has been completed, review the results to confirm that the selected records were successfully sent.
If a record cannot be exported, review the Employee, Client, Service, and visit information for missing or incorrect EVV data before attempting the export again.
Tip: Correct any identified issues in Celayix before re-exporting the affected records.
Need Help?
If you're unable to export EVV data or are unsure about the information required for your state or EVV provider, contact Celayix Support for assistance.