
Create Workflows
Create a Workflow using a ready-made template and configure it to automate a scheduling process.
Create a Workflow
- Navigate to Workflows.
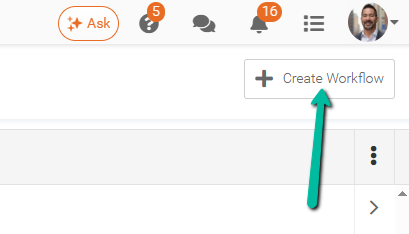
- Select Create Workflow.
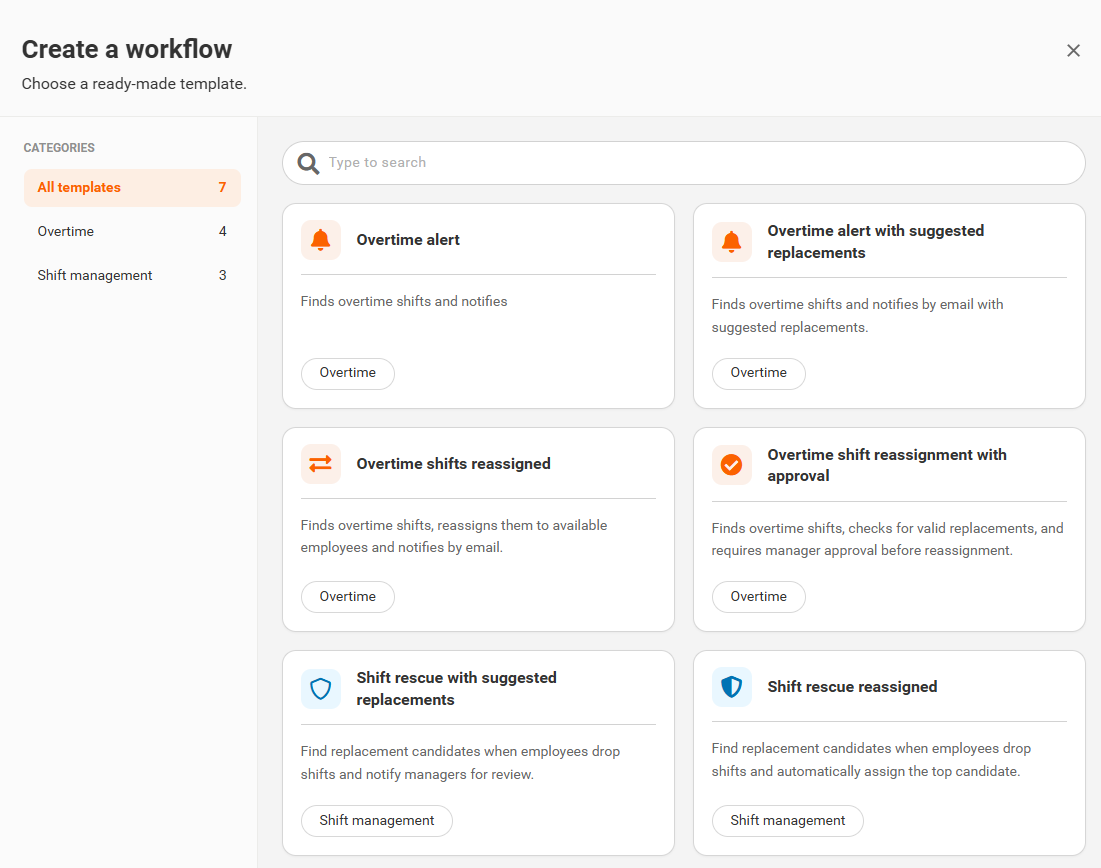
- Select the template you want to use.
You can use the Categories on the left to filter templates by Overtime or Shift Management, or use the search bar to find a specific template.
Once selected, the Workflow opens and displays the nodes included with that template.
Clone an Existing Workflow
Instead of creating a Workflow from a template, you can clone an existing Workflow to use its current configuration as a starting point.
- Open the Workflow you want to copy.
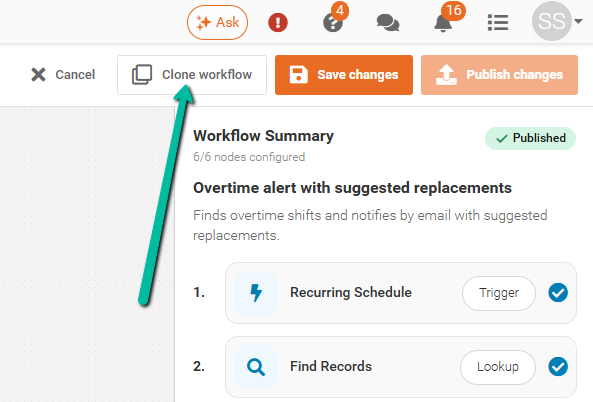
- Select Clone workflow.
- Update the cloned Workflow's name and configuration as required.
- Validate and publish the new Workflow when ready.
Cloning can be useful when creating a Workflow that requires similar settings to one you have already configured.
Configure the Workflow
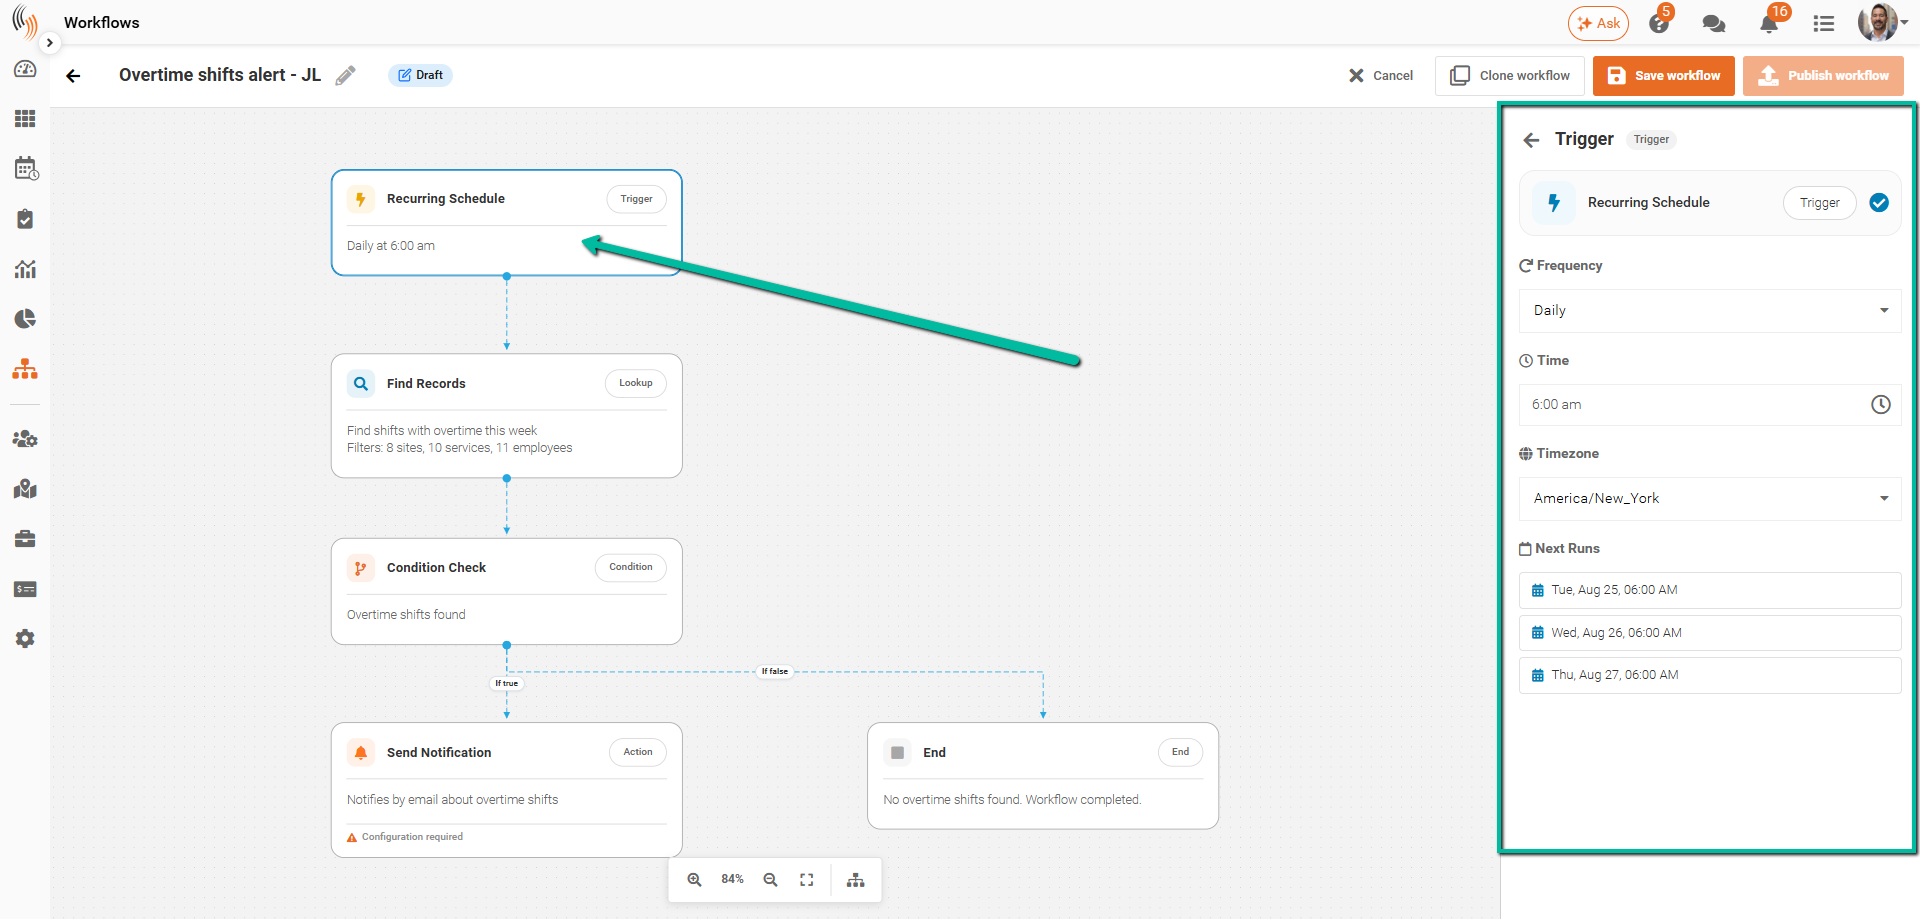
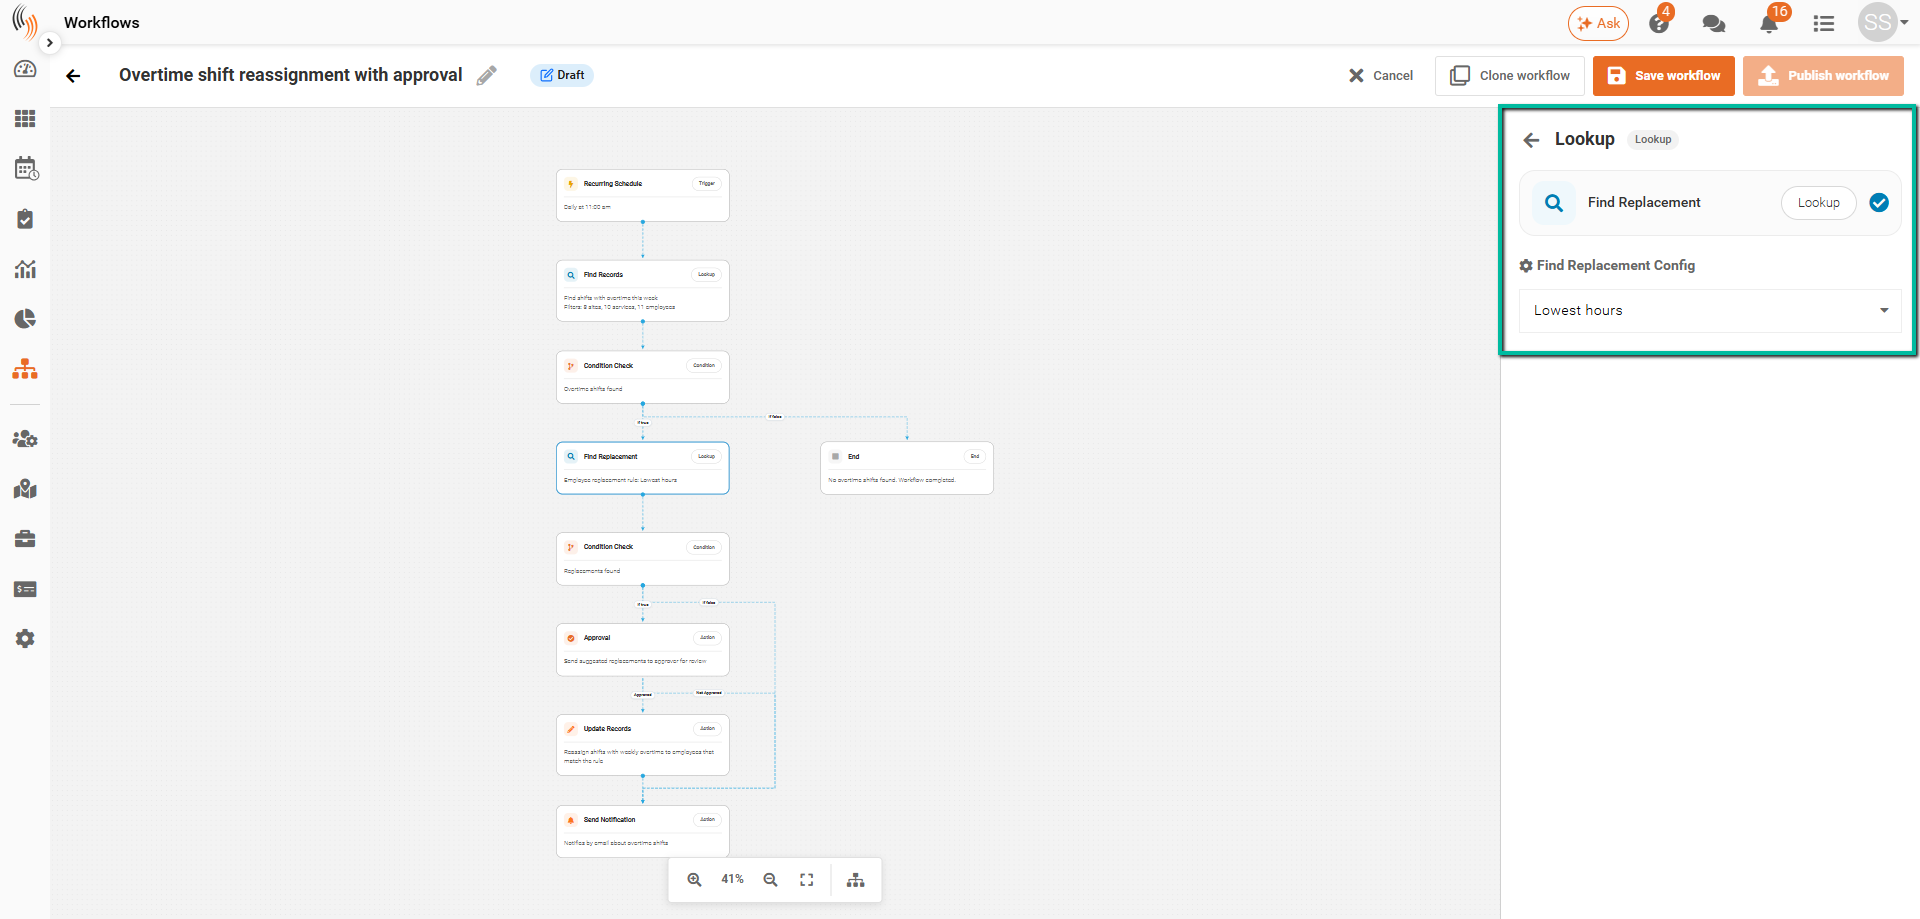
The Workflow Summary displays each node that needs to be configured.
Select a node to configure its settings. Work through each required node until the Workflow Summary shows that all required nodes have been configured.
Depending on the template selected, this can include configuring the:
- Trigger
- Lookup
- Condition
- Action
For Workflows that find replacement employees, the Find Replacement Lookup uses Employee Search Rules to determine which eligible employees should be considered. The Employee Sort Order configured within the selected rule determines how eligible replacements are prioritized, such as by Lowest Hours.
You can also select the pencil icon beside the Workflow name to rename it.
Important: Any nodes showing Configuration Required must be completed before the Workflow can be published
Validate the Workflow
Once all required nodes have been configured:
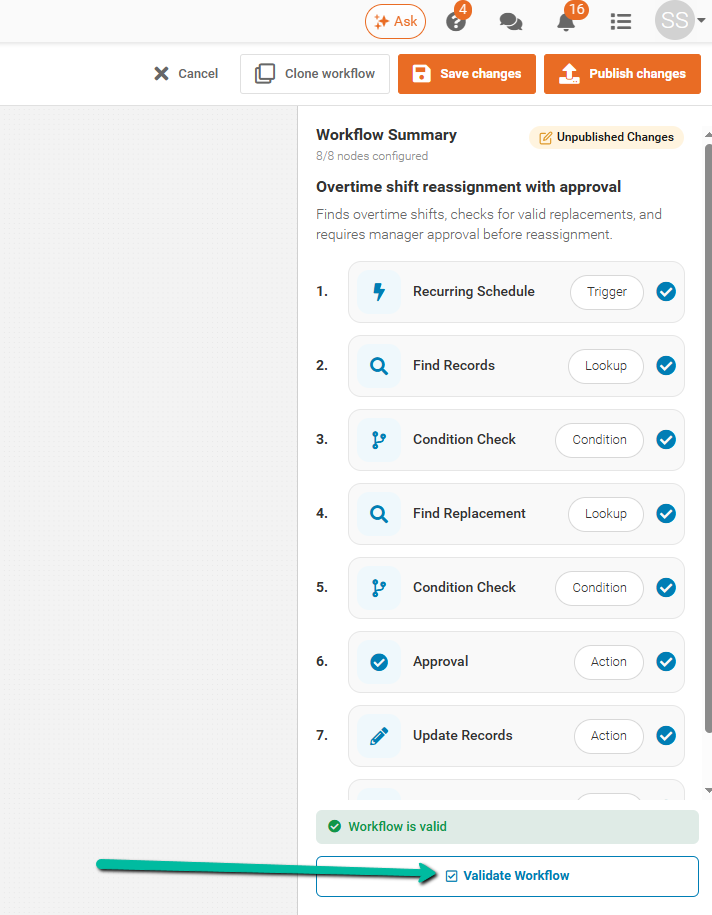
- Select Validate Workflow to check that the Workflow has been configured correctly.
- If validation is successful, Workflow is valid will display in green.
- If any configuration issues are identified, resolve them and validate the Workflow again.
Save or Publish the Workflow
Once the Workflow has been successfully validated:
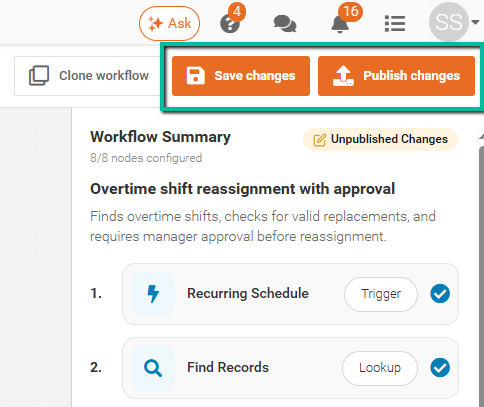
- Select Save Workflow to save your changes without publishing.
- Select Publish Workflow when you're ready for the Workflow to become active.
A Workflow remains in Draft status until it is published.
Receiving Workflow Notifications
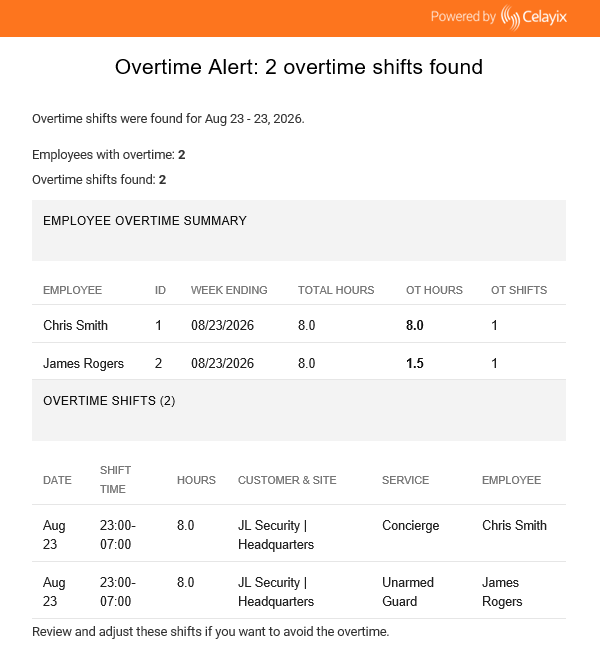
When a Workflow includes a notification action, the selected recipients will receive an email when the relevant conditions are met.
Depending on the Workflow, the email may be informational or require the recipient to take action.
Informational Notifications
Some notifications are provided for information only and do not require any action. For example, a Workflow may alert you that overtime has been identified or that a shift has been automatically reassigned.
Suggested Replacements
Some notifications provide suggested replacement employees for affected shifts. The email displays the original employee and suggested replacement, allowing you to review the recommendations before making any changes.
No changes are automatically made from these notifications.
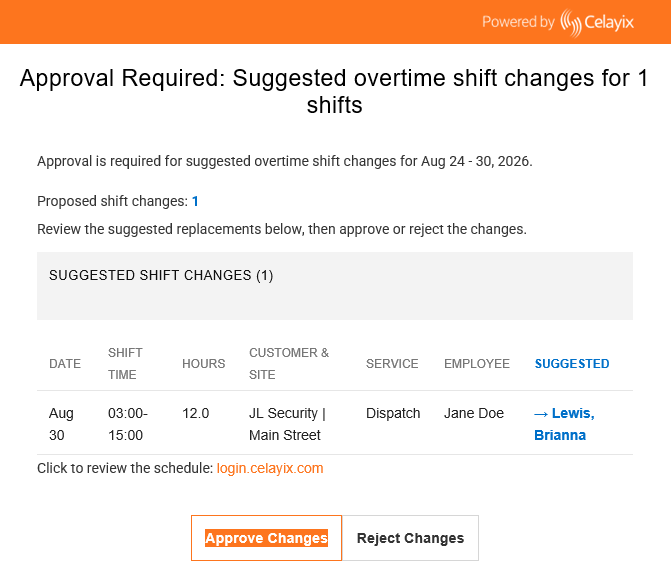
Approval Required
Workflows configured with an approval step require the recipient to make a decision before the proposed change can take place.
The email displays the proposed shift change and provides options to Approve Changes or Reject Changes.
Approval Validation
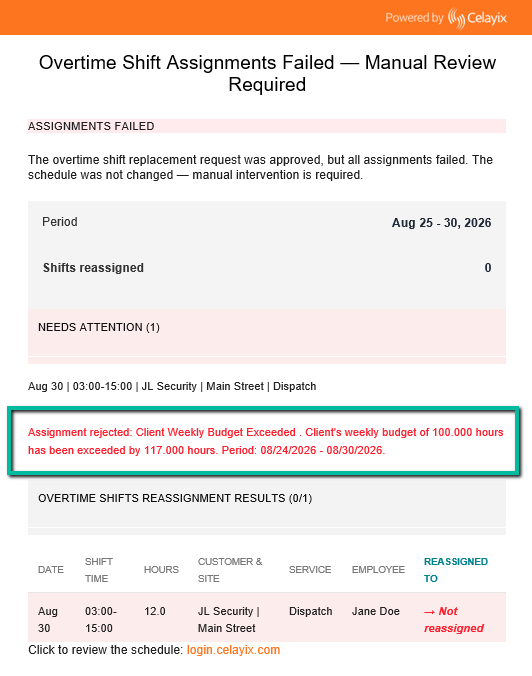
Even when a Workflow includes an approval step, the proposed change must still pass all applicable scheduling validations before it can be completed.
If the change fails a validation, such as an employee not meeting the required Qualifications, exceeding a configured Budget, or another scheduling restriction, the assignment will be rejected and the shift will remain unchanged.
The email will identify the reason the assignment failed so the schedule can be reviewed and updated manually.
Next Steps
To learn how to view and make changes to existing Workflows, see Manage Workflows.