
Connect ChatGPT to Schedule Xpress Using MCP Server
The Celayix MCP Server allows approved AI assistants to securely connect to live Schedule Xpress data. Once configured, managers can ask questions in plain language about schedules, employees, attendance, time off, qualifications, and more, without manually searching through Schedule Xpress.
Examples include:
- Who is scheduled at the Downtown site tomorrow?
- Which employees have certifications expiring soon?
- Who is currently on approved time off?
Access the MCP Server
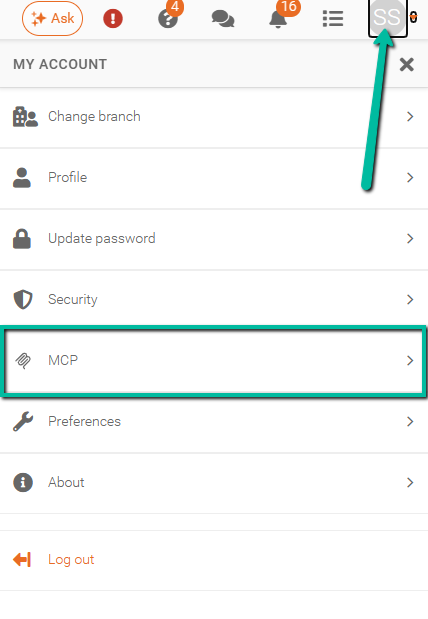
If the feature has been enabled by Celayix, the MCP option will be available under:
My Account → MCP
Create an MCP Token
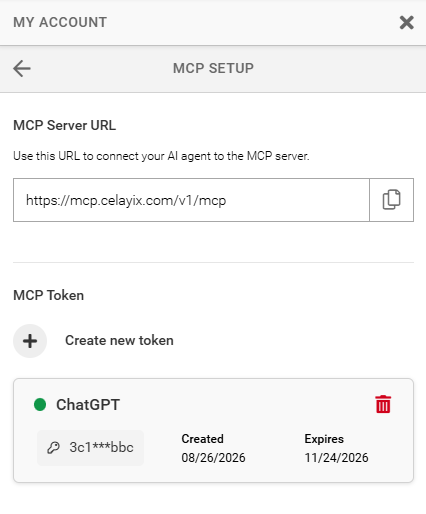
To connect your AI assistant, you must first create an MCP token.
- Navigate to My Account → MCP.
- Click Create New Token.
- Enter your Schedule Xpress password.
- Enter a name for the token.
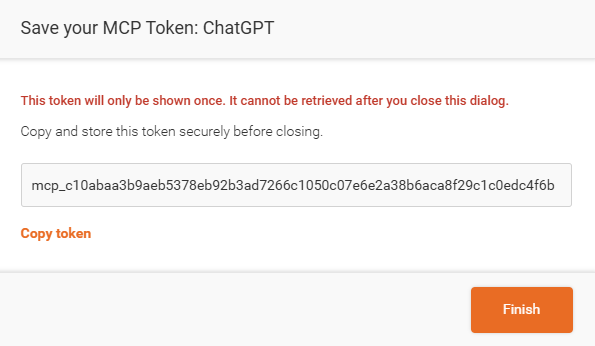
- Copy the generated token.
Important: The token is only shown when it is created. Store it securely, as it is used to authenticate your AI assistant.
Connect ChatGPT (Codex) to Schedule Xpress
To use MCP with ChatGPT, you must first download and install Codex on your computer.
Before you begin ensure you have the following information available from Schedule Xpress:
- The MCP URL
- The token generated for the MCP connection
Step 1: Create an Environment Variable in Windows
- From the taskbar in your PC, search for Edit system environment variables
- Click on Environment Variables
- Under User variables, select New.
- Enter a name in the Variable name field. This name will be used later when configuring the MCP server in ChatGPT.
- In the Variable value field, enter the token generated in Schedule Xpress.
- Select OK to save the variable.
- Select OK on the remaining windows to save your changes and close the dialog boxes
Important: Make note of the environment variable name you created. You will need to enter the same name when configuring the MCP server in ChatGPT.
Step 2: Open the MCP Settings in ChatGPT
- Open the ChatGPT desktop application.
- Navigate to your user profile and select Settings.
- Under Integrations, select Plugins.
- From the Plugins settings, select MCPs.
- Select Add Server.
Step 3: Configure the MCP Server
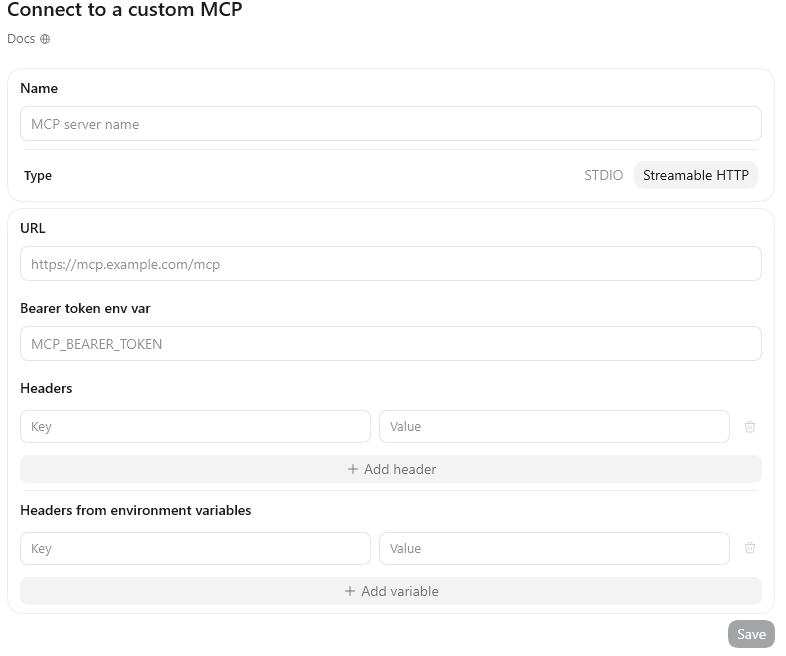
Enter the following information:
- Name: Enter a name for the MCP server, such as
Celayix MCP. - Type: Select Streamable HTTP.
- URL: Enter the MCP URL copied from Schedule Xpress.
- Environment Variable: Enter the exact name of the environment variable you created in Step 1.
In the Headers section, enter:
- Key: Authorization
- Value: Bearer
Once all the information has been entered, select Save.
Step 4: Restart ChatGPT
After saving the MCP configuration:
- Close the ChatGPT desktop application completely.
- If ChatGPT continues to run in the background, open Task Manager and end the ChatGPT process.
- Restart the ChatGPT desktop application.
- From the dropdown in the upper-left corner of ChatGPT, select Codex instead of ChatGPT.
The Celayix MCP server should now be available for use through ChatGPT.